


Starter shingles are true to their name. Like everything, a roofing project needs to start somewhere, and this is where starter shingles come in. There are many arguments out there regarding starter shingles, how important they are, and how they should be installed.
While many roofers in the past have tried to install 3-tab shingles in place of starter shingles, it is now considered a major red flag. Starter shingles have their own purpose on your roof and they can’t just be replaced by other materials. In this blog post, we will dive right in to understand why starter shingles are a must-have for your roofing project.
What Are Starter Shingles?
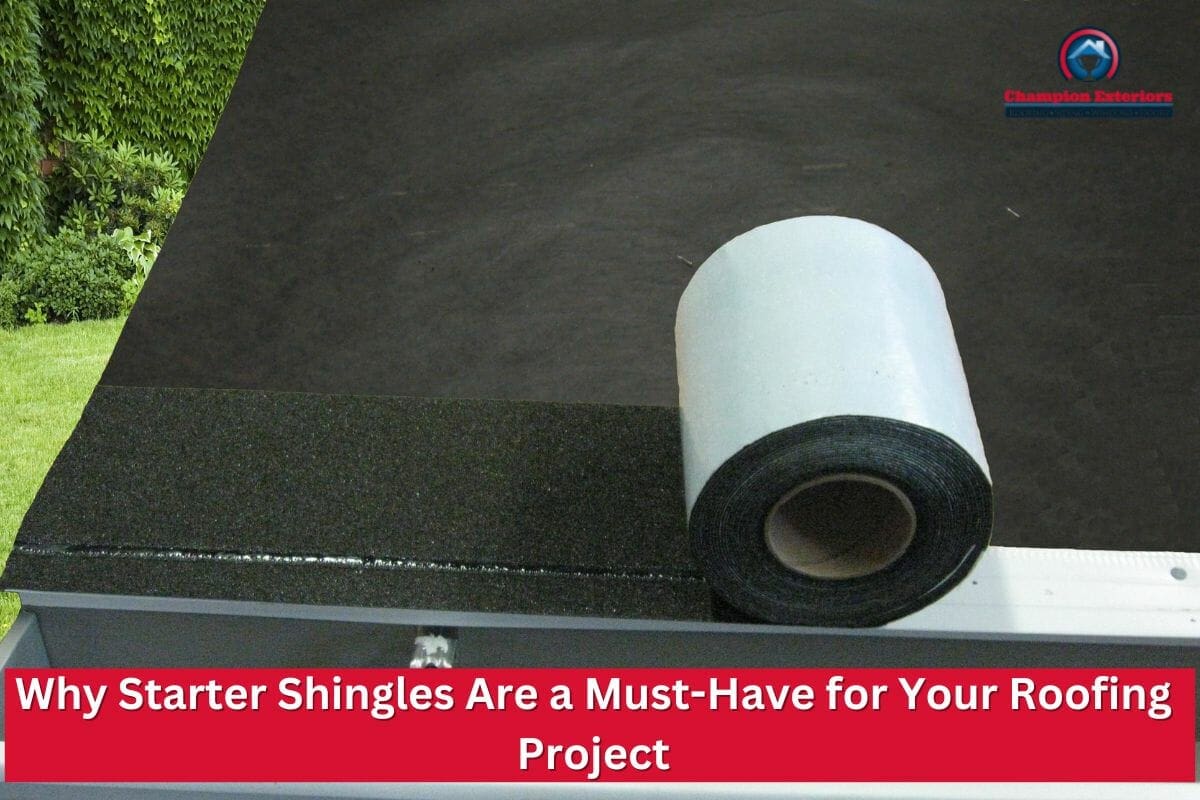
Starter shingles, or shingle starter strips, are long narrow strips made of asphalt that are covered in granules and are installed along the eaves, ridges, and rake of your roof. Before starting a roofing project, starter shingles are installed to lay the foundation for regular asphalt shingles.
The Difference Between Starter Shingles And Regular Shingles
Starter shingles, as mentioned above, are a type of shingle specifically designed for the initial row of shingles along the edges of your roof. They’re usually adhesive-backed and are nailed horizontally along the eaves and rakes of the roof. Acting as the first layer of defense against elements and water intrusion, these shingles provide regular shingles with a strong base.
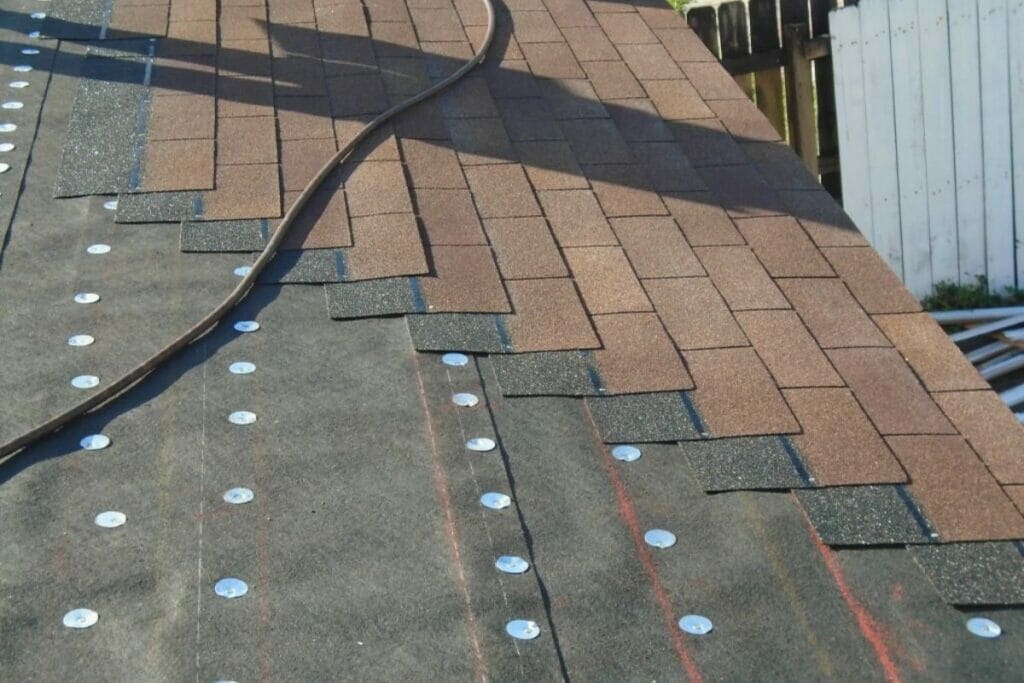
In contrast to shingle starter strips, regular shingles are the star player of the roof. Regular shingles are the main material that covers most of your roof’s surface. They come in various styles, materials, and colors, allowing you to choose the aesthetic that matches your home. Regular shingles are placed over the starter shingles and overlap one another to create a protective barrier against the elements.
The Role Of Starter Shingles On Your Roof
Starter shingles aren’t only installed to start a roofing project; they serve a specific purpose. Installed along the roof eaves, these starter shingles provide a strong base for regular asphalt shingles. In addition, these shingles increase the aesthetic appeal of your roof, stop pest infestations, and prevent your roof from water and wind damage. Starter shingles are made of the same material as asphalt shingles to blend with them and provide them with strong adhesion.
One of the big advantages of starter shingles is that they keep shingles in position and in tip-top shape. Along the edges of a roof, asphalt shingles are susceptible to curling, lifting, and blowing off because of high winds and strong storms. The curled and lifted shingles expose the roof deck to the elements and make it vulnerable to water damage, which ultimately results in more severe roof damage. However, if you have shingle starter strips nailed down on your roof, there are fewer chances of this happening.
The next question on your mind may be, are starter shingles necessary? If you require a new roof installation or a roof replacement, you must install starter shingles.
The Advantages of Starter Shingles
1. Boosting Roof Longevity – A Solid Foundation for Success
You want your roof to stand the test of time, don’t you? Of course, you do! Then installing starter shingles can significantly extend your roof’s lifespan. Much of the damage that occurs on roofs is due to water leaks, excess moisture, and strong winds. By preventing water infiltration and wind damage along the roof’s edges and corners, these shingles ensure your roof’s structural integrity for years to come.
2. Say Goodbye to Leaks – Guarding Against Water Intrusion
Nobody wants to deal with water damage inside their home, and leaks cause nothing but headaches. Well, starter shingles are your first line of defense against this unwelcome surprise.
Since they adhere tightly to the edges of your roof, they create a watertight seal that prevents rainwater from sneaking into your home.
3. Installation Made Easy – Saving Time and Effort
Installed along your roof boundaries, these long strips not only provide a seamless transition between the roof deck and the rest of the roofing material but also simplify the installation process. In other words, they lay the foundation for installing the rest of the roofing shingles. This means less time spent laboring on your roof and more time enjoying your safe, dry home.
4. A Wind Resistant Upgrade – Holding Steady Amidst the Storm
Starter shingles keep your entire roofing system grounded and stable in all weather conditions. On roofs without starter shingles, wind can get under the roofing materials, causing them to tear away and blow off. This exposes your roof underlayment to harsh elements and whatever Mother Nature throws its way.
Shingle starter strips, on the other hand, firmly anchor the lower edges, preventing wind from getting underneath your shingles and tearing them away.
5. Enhancing Aesthetics – The Visual Appeal Factor
Your home’s curb appeal matters and starter shingles help with this as well. They create a clean and polished look along the edges of your roof, ensuring a sleek finish that enhances your home’s overall appearance. It’s the little details that make a big difference!
6. Cost-Effective Protection – Invest Now, Save Later
While you might be thinking of skipping shingle starter strips to cut costs, consider this: they’re a relatively small investment that can save you big bucks in the long run. By preventing damage and extending your roof’s lifespan, they help you avoid pricey repairs and replacements down the road. It’s a smart move for your wallet.
Also Read: Average Cost Of A Roof Replacement In New Jersey: A Comprehensive Guide.
7. Compatibility with Various Materials – Versatility At Its Best
Whether you’re into asphalt shingles, wood shakes, or something more unique, starter shingles work well with all types of roofs. They’re compatible with a variety of roofing materials, ensuring a seamless integration that enhances the performance and durability of your roof, no matter your aesthetic preferences.
Can You Use Regular 3-Tab Shingles As Starter Shingles?
While it’s technically possible to use regular 3-tab shingles as starter shingles, it’s not the ideal choice. Shingle starter strips are specifically designed with features that enhance their performance in their foundational role. Dedicated starter shingles have adhesive strips to secure them in place, preventing wind uplift and ensuring a water-resistant barrier. 3-Tab shingles lack these features, potentially compromising the overall integrity of your roofing system. Moreover, using 3-tab shingles as starter shingles might lead to issues such as inadequate sealing, reduced wind resistance, and a compromised water barrier.
Whether it’s architectural shingles or 3-tab shingles, you must avoid using alternative materials as starter shingles on your roof.
The Complete Guide To Installing Starter Shingles
Materials You’ll Need
Gather these materials before you begin:
- Starter shingles
- Roofing nails
- Hammer
- Utility knife
- Roofing adhesive
- Ladder
- Safety gear
Safety First
Before you climb up the ladder, make sure you’re wearing proper safety gear. This includes a sturdy pair of shoes, gloves, and safety glasses.
The Steps to Install Starter Shingles
1. Prepare The Roof
Clear any debris from the roof and ensure it’s clean and dry. This provides a smooth surface for the starter shingles.
2. Apply Roofing Adhesive
Apply a thin line of roofing adhesive along the eaves before laying down the shingle starter strips. This extra layer of protection strengthens the seal.
3. Position The Shingles
Starting at the bottom edge of the roof, place the starter shingles with the adhesive strip facing up. Overhang the eaves slightly, following your roof’s pitch.
4. Overlapping Technique
Overlap each starter shingle to ensure complete coverage. This prevents water from seeping between the shingles.
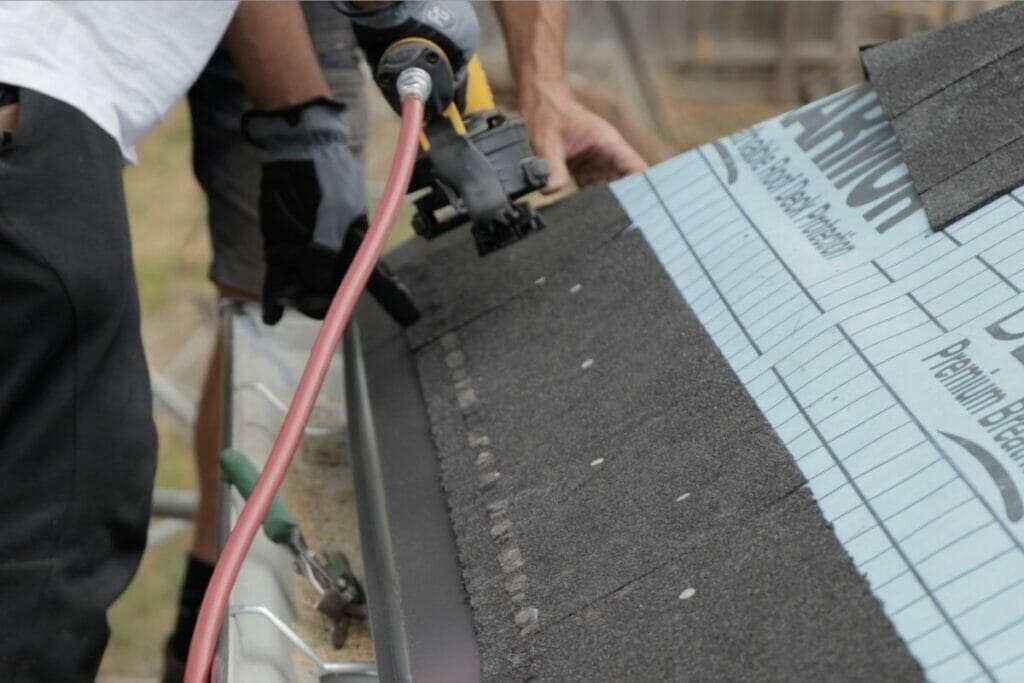
5. Fasten the Shingles
Using roofing nails, secure the starter shingles along the eaves. Place nails just above the adhesive strip to hide them from view.
6. Trim Excess
At the end of the row, use a utility knife to trim any excess off the overhanging strip. This creates a neat and tidy appearance.
Pro Tips For A Successful Installation
1. Check for Alignment
Regularly check that your starter shingles are aligned properly. This ensures a consistent look and helps prevent leaks.
2. Double Nailing
Consider double nailing for added security, especially in windy areas. Place nails about an inch above the adhesive strip and another near the top of the shingle.
3. Continue with Regular Shingles
Once your starter shingles are in place, you can proceed with installing the rest of the shingles. Remember to follow the manufacturer’s instructions for optimal results.
4. Clean Up
Dispose of any debris and leftover materials properly. A clean workspace is not only safe but also shows off your handiwork.
Remember, though it is possible to install starter shingles yourself, it is always best to seek help from a professional roofing contractor. They will ensure the job is done right so you can avoid costly mistakes that may come with a DIY installation.
Do You Want To Replace Your Roof In New Jersey?
Are you considering replacing your roof in New Jersey? Then we recommend getting a professional roof replacement. Consult professional roofers at Champion Exteriors in New Jersey and start your roofing project today. Champion Exterior boasts a team of trusted and professional roofers you can rely on. Call us today at (609) 845-3576 and consult a roofing professional about your roof replacement in New Jersey.