


If you are a DIY enthusiast or simply a homeowner, you might have encountered the term roof flashing, or step flashing, at least once in your life. But counter flashing, though it’s an important part of your roofing system, has always been lesser known by home and property owners.
Do you want to know what role counter flashing plays in protecting the chimneys and skylights on your roof? In simple terms, it shields these roofing components from debris and water damage, and avoiding its installation can leave you with expensive repairs.
Let’s Take A Quick Look At Roof Flashing
Roof flashing includes metal strips or sheets installed along vulnerable points of the roof, such as areas where your chimney or skylight meets the roof. It primarily serves to prevent water from infiltrating your home during rain, snow, or storms. Without different types of flashing, your roof and home could become susceptible to potential water damage.
Common Flashing Materials
Flashing can be made from various materials, including:
- Aluminum: Lightweight and corrosion-resistant, making it a popular choice
- Copper: Known for its longevity and durability
- Galvanized Steel: Affordable and durable, suitable for most climates
- Rubberized Membrane: Ideal for sealing around skylights and chimneys
Types of Roof Flashing That Come Into Play Around Chimneys and Skylights
1. Step Flashing
Step flashing is more of a roofing technique where individual pieces of flashing are layered, much like shingles themselves. These pieces are installed as the shingles are laid in place, with each layer overlapping the previous one. This method creates a tight, water-resistant barrier around the chimney.
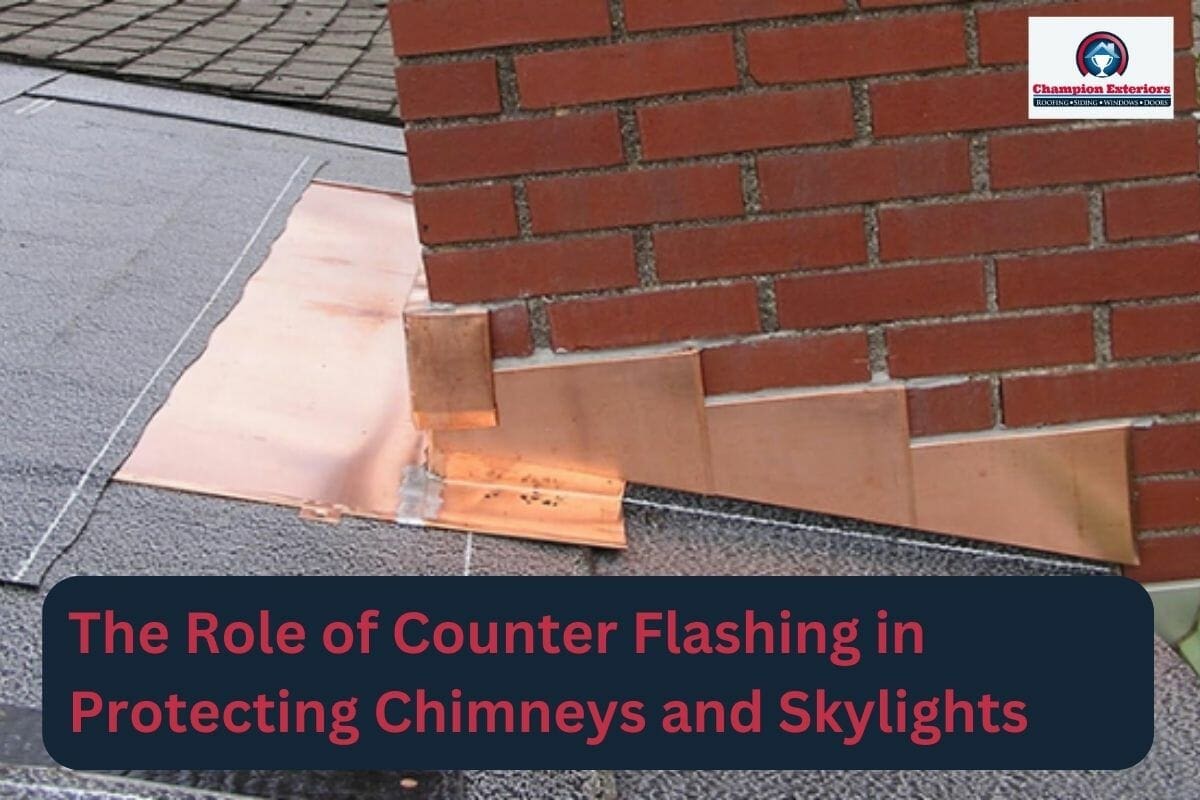
2. Counter Flashing
Counter flashing is often used in combination with step flashing and base flashing. It’s a secondary layer of flashing installed on top of the step flashing. Above the step flashing, counter flashing is installed directly onto the chimney wall. This dual flashing approach ensures complete water protection for the chimney and skylight wall.
3. Base Flashing/Apron Flashing
Base flashing, also known as apron flashing, is installed at the base of the chimney or skylight. It comes in an L-shape and is a single piece of flashing that runs along the bottom of the chimney. The L-shape of the apron flashing helps create a watertight seal between the chimney and the roof. This prevents water from getting in through the bottom of the chimney.
Understanding Counter Flashing In Depth
Counter flashing is installed along with step flashing and base flashing. It is a protective covering installed over the top edges of the step flashing or the top of the base flashing and is made of metal or another durable material.
Purpose: Counter flashing primarily serves to protect step flashing or base flashing from the elements, particularly from water intrusion. It covers the top edge of the other types of flashing, preventing water from getting behind the flashing and the wall.
Sealing: Counter flashing is sealed or secured to the mortar joint using the necessary methods and materials to create a watertight seal. This ensures that water cannot penetrate behind the step or base flashing.
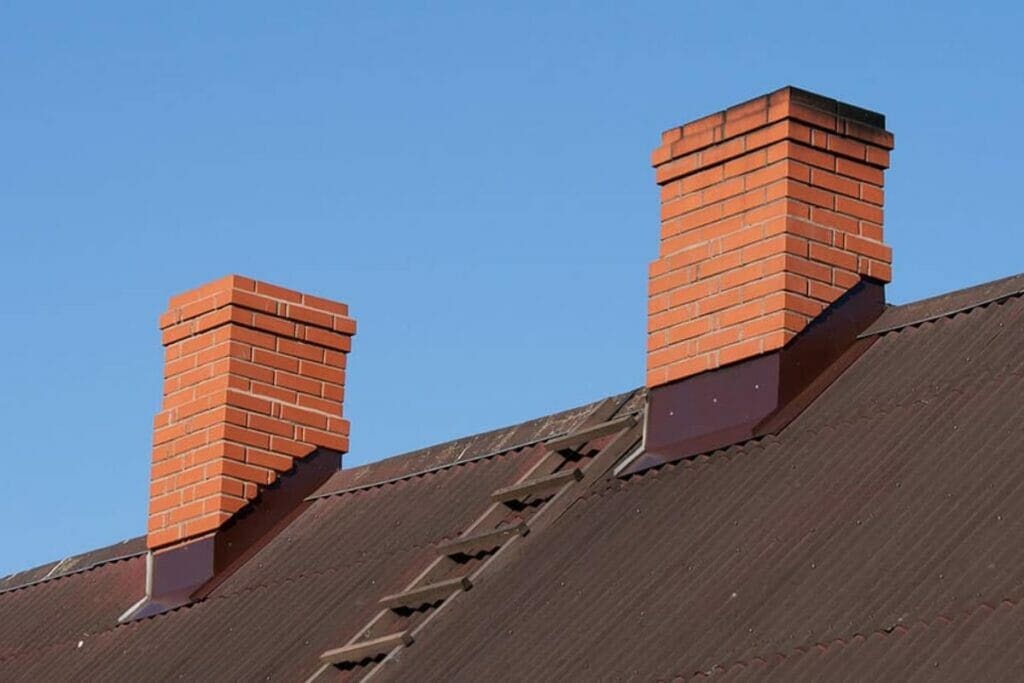
Why Counter Flashing Is Installed Around Chimneys And Skylights
Chimneys and skylights are fantastic additions to any home, but, like everything, they also come with a vulnerability – the place where they cut through your roof. These openings are potential weak points, where water can find its way inside and seep into your attic and home.
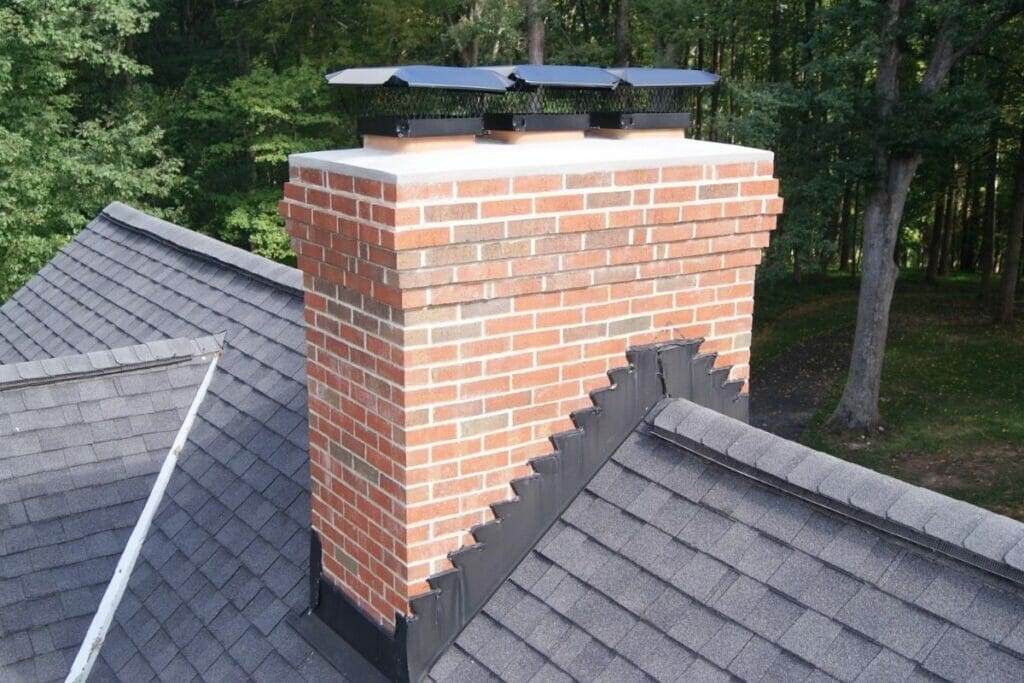
Counter flashing is like a guardian angel; not only of the chimneys and skylights, but also the attic and the home’s interior. It’s a protective barrier, generally made of metal, and installed to keep water and debris from accumulating around where the chimney or skylight meets your roof.
How Counter Flashing Protects Chimneys And Skylights
Now, let’s focus on how counter flashing protects your chimney and the surrounding area.
1. Protecting Your Chimney
When it comes to chimneys, there are two types of flashing at play: base flashing and counter flashing.
Base Flashing: This is the first layer of protection installed underneath the shingles or roofing material around the base of the chimney. It prevents water from seeping into the roof deck.
Counter Flashing: As mentioned above, counter flashing creates a watertight seal by being attached to the chimney while also covering the top of, and protecting, the base flashing.
Prevent Expensive Repairs
Without counter flashing, your chimney is at risk. Water can infiltrate the roof and the roof deck, which can lead to a host of problems from damaged insulation to wood rot and even mold growth. These issues can quickly become expensive repairs, and you wouldn’t want that!
Add Years to Your Chimney’s Lifespan
The base of the chimney requires special attention since it is directly connected to your roof and can come in contact with water and debris. With counter flashing in place, your chimney can stand strong against the elements for years to come. Counter flashing acts as armor for your chimney, even in the harshest conditions.
2. Shielding Your Skylights
Like chimneys, skylights create an area where water can collect and seep into your roof deck. While skylights bring in cool air and bright lights, they remain susceptible to damage until flashing is properly installed around it.
Skylight Flashing Setup
Just like chimneys, skylights also have their own flashing setup. This includes step flashing, apron flashing, head flashing, and, of course, counter flashing.
Step Flashing: This is installed underneath the shingles and directly around the skylight itself. Step flashing, as the name suggests, creates a series of small steps around the skylight and effectively channels it away into the gutters.
Apron Flashing/Base Flashing: Apron flashing is an L-shaped flashing that is positioned along the bottom of the skylight and slides under the shingles.
Head Flashing: Head flashing is the top piece of metal flashing installed on the top part of the skylight.
Counter Flashing: Like with a chimney, counter flashing is installed over the top of the
step flashing, forming the ultimate barrier against water intrusion.
Protect Your Home From Unwanted Leaks
Homeowners install skylights to let in natural light, but skylights have their own prerequisites. They can quickly turn into a nightmare if they are not properly sealed and flashed. Without counter flashing, you may experience rain inside your home during heavy storms.
Add Life To Your Skylight
One of the most significant benefits of counter flashing on skylights is the peace of mind it provides. You can enjoy the natural light and the fresh air coming through the skylights without worrying about water damage to your ceilings, walls, or floors. Since skylights can be one of the most vulnerable areas on your roof, the flashing ultimately adds life to them by keeping the water intrusion to a minimum.
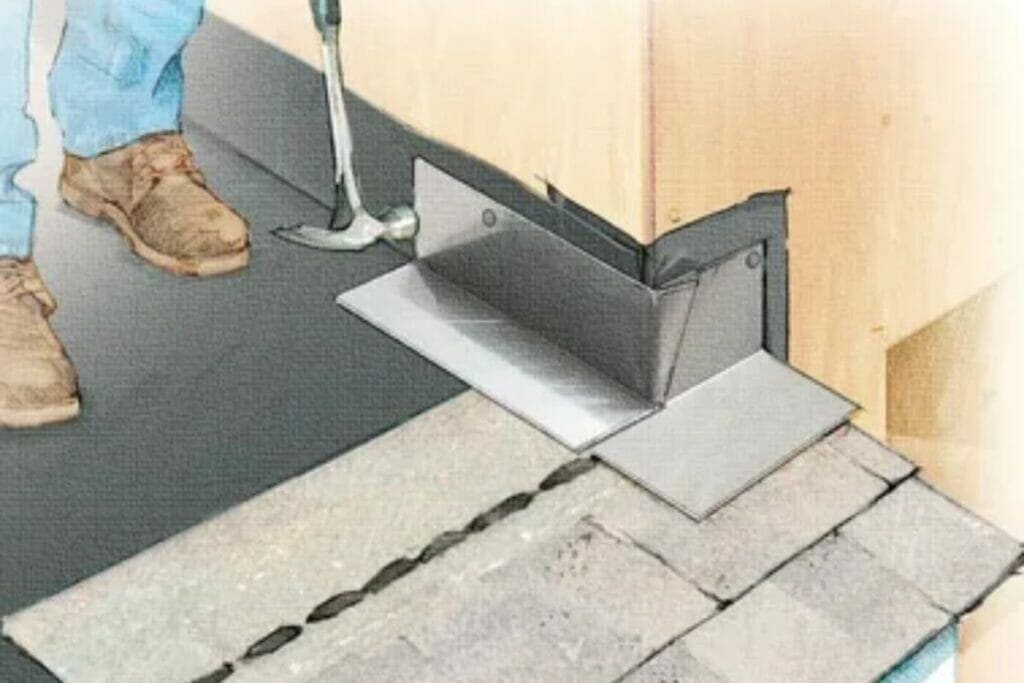
How To Install Counter Flashing Around Chimney And Skylights
Step 1: Remove Old Flashing
If you have installed flashing before, ensure you remove it before you install new ones. While many roofers will not recommend that you remove them if they aren’t rotten or damaged, replacing them may be the right choice if you want them to work for a long time. Here’s how you do it:
- Carefully lift the shingles or tiles surrounding the chimney or skylight using a pry bar
- Gently pull off the old flashing, taking care not to damage the roof or siding
- Clean the area thoroughly, removing any debris or old sealant
Step 2: Measure and Cut the Counter Flashing
Measure the sides of the chimney or skylight where you’ll be installing the flashing.
Using your tin snips, cut the counter flashing to the measured length, ensuring it’s long enough to extend at least 2 inches beyond the sides.
Step 3: Install the Counter Flashing
It’s time to install the counter flashing securely:
- Slide the counter flashing over the top of the chimney or skylight.
- Gently lift the shingles above the flashing and slide it underneath.
- Secure the flashing by nailing it in place using flashing nails. Place the nails at regular intervals, ensuring a tight seal.
Best Roofing Services In New Jersey
If you want to install or replace your roof in New Jersey, you can contact the best roofing service provider here – Champion Exteriors. Our roofing company is home to skilled and professional roofing contractors who you can trust and rely on. Contact us today at (609)-845-3576 and hire a team of skilled and experienced roofers for your new roof installation, or existing roof replacement.